Tuesday, November 5, 2013

Mini-Crock Pot Keeps Lids Warm!

My kitchen is a good size for our family. It is not huge, however.

Especially when I'm canning.

I usually have to play a sliding puzzle game while I'm preparing the food to go in jars. Trying to keep a small pot on the stove to heat the lids has been quite a challenge with some recipes.

I remembered a small crock pot I had tucked away in the closet and brought it out. I filled it with hot water and turned the setting to high. I put in the lids I would need for this batch of grape juice, and started the juicer.

By the time the first jar was ready to be covered with a lid, the mini-crock pot had the lids simmering nicely!

Here it is with a few small lids inside.
You can't tell from the photo, but the water is steaming and is keeping the lids very hot, even when I turned it down to low.
I will be using this little gem again! It saves me a burner on the stove, and I can put it in a spot that saves me some counter space for food preparation.

Friday, November 1, 2013

New England Clam Chowder

This is our favorite New England Clam Chowder recipe.

1 lb hickory-smoked bacon, cooked, drained, and crumbled (save 2 Tbl grease)
1 medium yellow onion, chopped
1/2 cup celery, chopped (optional)
1 BIG can clams (51 oz can. I use SeaWatch brand Chopped Sea Clams from Costco)
1 quart Half and Half
1/2 cup Ultra Gel thickener
4 medium potatoes, cubed and boiled
4 oz cream cheese softened in the microwave
1 Tbl basil
2 tsp salt

Drain clams and reserve the liquid.

Peel, cube, and boil 4 medium potatoes until tender. Drain and set aside. I use a 2 quart pot.

While the potatoes are cooking, fry (or oven bake) bacon, crumble or cut into pieces, set aside.

In a large Dutch oven, saute onion in 2 Tbl bacon grease (or use butter) until onion is translucent. (You can saute 1/2 cup chopped celery with the onion if you like celery). Leave in the pot.

In a blender, mix reserved clam juice with 1/2 cup Ultra Gel thickener until thick. You might have to adjust the amount of Ultra Gel to your likeness.

Add the clam juice to the sauteed onions and garlic.

Add 1 quart of Half and Half,  salt, basil, and the softened cream cheese. Heat until the cream cheese is melted.

Add the cooked potatoes.

Add enough Half and Half until you like the thickness of the chowder.

Just before serving add the clams and bacon. If you add them while the soup is cooking they will become rubbery (yuck!)

*****************  Notes *****************
You can add milk if the soup is too thick, or add more Ultra Gel if it isn't thick enough.

We usually serve corn bread along with our Clam Chowder, especially on Christmas Eve. This is our traditional Christmas Eve dinner.

If you have teenagers, you can cut down on the amount of bacon in the soup by leaving the bacon on the counter. They will come along and snack on a few pieces to save you the calories!


Saturday, October 26, 2013

Bottling Rhubarb

Whenever I teach canning I always teach about canning small batches. I love small batches!

Don't get me wrong, I love big batches, too.

There are advantages to small batches which include trying a new recipe or being short on time or being short on produce.

Today I canned 2 quarts of rhubarb. That's it, just 2 quarts. I didn't have to get out my big pots, which is also a nice benefit to a small batch.

2 Quarts of rhubarb took me about 1 hour 20 minutes, including harvesting the rhubarb.

We'll be using this for pie at Thanksgiving so we don't really need that much. If I had more, I would have bottled more because the pot I used would have held another quart or two and it wouldn't have added more than 5 minutes to my time.

Here is the recipe I used. It is from the USDA Complete Guide to Home Canning and is found on page 2-22. You can find the entire guide at the above link. It's a great canning resource, and it's free!
I trimmed the leaves from the stalks before I cut the stalks from the ground. You can clip the stems and then trim the leaves, but I wanted to make sure there was no oxalic acid backwashing into the stems. We've had that problem before and it was no fun!

Here is my pile of leaves ready for the trash. Here is a great tutorial on how to harvest rhubarb.

Washed stems ready to cut into 1" or 1 1/2" sections.

Chopped and ready for the pan. This is about 8 cups of rhubarb, which will be about 2 quarts.

Add 1/2 cup sugar per quart of rhubarb. Let it sit until juices appear. That will take about 30 minutes or so. After the juices start flowing, slowly bring the pan to a boil.

Quickly fill hot quart (or pint) jars with rhubarb and juice. Leave 1/2" headspace (that's what the green thing is for.) It's important to have the right amount of headspace to insure a good seal and prevent the food from spilling out over the top. I didn't have quite enough liquid so I added a little bit of very light syrup to make sure I had the right amount of headspace.
Screw on the hot lids and bands so that the bands are finger tip tight.

Since this isn't my normal canning pot, I use an old cake stand in the bottom of the pan to keep the jars from touching the bottom.

As long as the pot is deep enough to cover the jars with 1"-2" of water, you can use the pot for canning. I use my headspace measurement wand to make sure that the water is at least 1" above the top of the jars.

This is the pan I use for small batches. It is filled with water that is already at 140˚F.
Bring the water to a boil and start your timer. At my altitude, I process the rhubarb for 20 minutes.

Pull the jars out with a jar lifter and sit on a towel on the counter. If your kitchen is cold, then cover the jars with a towel so they will cool slowly and not crack.

All done and ready for the rings to be removed and the labels to be put on!
You'll probably notice that my liquid level is low. This usually happens when my water is boiling too hard as I'm processing the food. It was this time, I was out of the kitchen and when I came in to check, I had to turn down the heat. The only thing that will happen is that the food above the liquid line will discolor, there isn't anything wrong with the food itself. Since these will be stored in a dark, cool room and they will be used within 6 weeks, there may not be any discoloring at all.


Thursday, October 24, 2013

Snowman Dish Towels

One of our favorite things to do is to help out. My friend's church is having an old fashioned bazaar and quilt show November 7, 8, and 9th. They are raising money to replace their crumbling stained glass windows. Here's a link to an article about the fundraiser.

This beautiful church was established in 1877. It was used as a mission church to Utah Valley, and it has been the center a center for worship for the Presbyterian Church for 135 years! It has also been used as a school and it is listed on the National Register of Historic Places.

I love hearing the bells strike every hour. It doesn't matter what the weather is, if I'm close to the church and hear the bells ringing, I roll down my car windows.

I've got a few things planned to donate. Here is the first batch.


You can find these free snowman designs along with many others at Charming Station. Join their Yahoo group, too! It's a wonderful group of machine embroidery enthusiasts!

If you live close by, be sure to stop in to their Quilt Show and Old Fashioned Bazaar on November 7th, 8th, and 9th. (75 North 100 East in American Fork) Just in time for the holidays!

Monday, October 21, 2013

Grape Juice

I've been bottling the last few weeks. Today I'm processing grape juice. I have a juicer that my mother-in-law gave me many years ago. I've used it almost every year. That's the kind of investment I like!

Here are the directions I use.
Grape Juice

I USED to use the open kettle method of bottling grape juice. Open kettle means that you put the hot product in a hot jar, put a lid and ring on the jar, and call it 'done'.

Not done! "True home canning is when the food is heated enough to destroy or sufficiently acid enough to prevent growth of all spores of Clostridium botulinum (that causes botulism) and other pathogens during room temperature storage on the shelf."

I process everything properly after learning more about botulism. I met a woman last week who is a nurse. When she lived in Idaho she took care of 3 members of a family that died from botulism from eating home canned food.

I rinse the grapes and make sure there are no spiders and no grapes with mold on them. Then put them in the steam juicer.

I add lids and rings and let the jars sit in the hot water until I have gotten all the juice from one juicer load of grapes.
At our altitude I process the grape juice for 20 minutes since I don't sterilize the jars before I start (although they have been washed in the dishwasher).

It's important to keep the juice hot since the processing time includes the juice beginning at a higher temperature.

I usually get about 5 quarts of juice from one juicer load of grapes.

Saturday, June 29, 2013

Fixing the Solar Light Post

We seem to buy new solar lights every three years or so because the plastic piece that attaches the light to the post gets broken.

I thought about what I could use to fix it and came up with this.


I removed the screw and the broken plastic piece from the bottom. I drilled a hole in a PVC cap, and screwed it to the bottom of the light using the original screw.

I haven't spray painted the cap yet. I did manage to spray paint the PVC pipe, which ended up being almost exactly the same color as the light itself.

Next I'll cut the PVC pipe to the size I need, and place the pipe on the rebar we have pounded in the flower beds.

Those little plastic spikes don't work in our rocky soil so we've been using rebar or 1/2" electrical conduit pounded into the ground instead.

The best part about the rebar and conduit is that they stay straight, the plastic spikes never did keep the light upright.

Thursday, May 2, 2013

Happy Steer

The steer loves the baby goats. They know it.

Unfortunately I don't have photos of the kids jumping all over him, which he seems to enjoy.

Here's a photo of one taking an afternoon rest with his big buddy.


He loves them so much that he licks all the Blu Kote off their disbudded heads!

If we pick one up or if we are feeding the little bottle kid, he's always there to check us out and make sure his little friends are okay.

Tuesday, April 30, 2013

Mastitis, Again

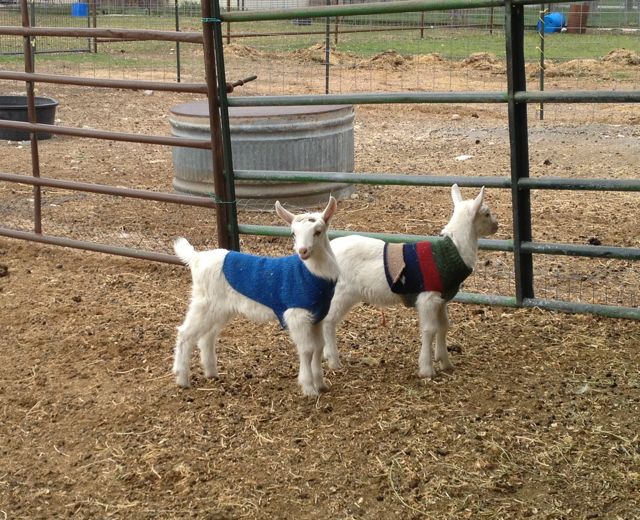
It's been a long few days. Four kids were born last Monday (4/22). We dried them off and got them in sweaters like we always do.

We made sure they had their first drink of colostrum, like we always do.

Gave them each a squirt of Nutri-Drench, like we always do.

The next day they seemed a little slow, but doing okay. Zoe is a first freshener and seemed to be a bit confused about the 2 kids at first.

Then she was okay.

Wednesday we lost one of Misty's kids. When I put Misty on the stand that night I realized she had a bad mastitis infection in her left udder.

It's been crazy since then!

The vet came out on Thursday. She's wonderful and we love her. She gave her a shot of Excede (a broad spectrum antibiotic) and Banamine (for pain and inflammation).

We were given instructions to strip out her udder twice a day and warm compress the udder twice a day. Also, give Equioxx paste (non-steroidal anti-inflamatory) twice a day to reduce the swelling in her udder, help control the pain, and help bring her 105F fever down. We also have to administer Spectramast L C once a day into her left teat.

By Saturday night Misty was worse so I texted the vet.

Dr. Wright came out again on Sunday morning because she's that type of vet... kind and caring.

She explained that there are four main types of mastitis and she had treated for the most common, and more easily treatable, first three. Apparently Misty had the fourth type. Good thing we called.

She placed a line for IV Ringers Lactate (Misty hadn't been eating or drinking), then she started on Baytril injectable (diluted with LRS) once daily, and Oxytetracycline injectable (LA 200) once daily.

Unfortunately she was so dehydrated that the line didn't stay in and she had to come out again on Monday and put it in the other leg.


Here she is today. The only thing she will eat right now is bananas.
So that's what we are giving her!
She seems to be doing better. We know she'll live, we're just waiting to see if she sloughs the lining of her left udder or if it heals.

Her surviving kid is doing great. She's on a bottle because the vet didn't want her on her mom. Thankfully we have Annie, who is a power milker. She's already feeding two kids, but has no trouble giving us an extra 1/2 gallon to feed the bottle kid.

I think part of the problem is that we couldn't get the mastitis vaccinations we needed last year because the company switched owners and stopped making it for a while. We didn't give them their vaccinations at the usual time. By the time I got the meds, I completely forgot about vaccinating.

All the other does have been started on their sequence of boosters and vaccinations now. Prevention is always best.

All the links to the meds are active if you are interested in looking up what they do.

Sunday, April 21, 2013

A New Duck

We were given a duck by a neighbor. She had three ducks as pets and for their eggs. One was killed by a mink or racoon. Another had it's bill ripped off by the same animal. We took that one to the vet to have it put down.

You may think that is odd since ducks are farm animals, but since these were pets. It was best for the family to have the vet take care of Cornwallis (female duck with a male name, long story, but she was the favorite).

My friend was so worried about the last duck that she asked us to take her.

Bianca is the black and white duck. She has fit into the flock without any trouble. She's the only one with a name since we don't name our chickens or ducks unless they happen to have a 'personality'.
We were lucky to find a vet who cared for 'exotic' animals. Farm animals are considered exotic if they are pets instead of living on a farm. At $60 it wasn't cheap to have the vet put down Cornwallis, but it was comforting to the family to know that she was cared for like any other severely injured, and beloved, family pet.

Saturday, April 20, 2013

Goat Kids 2013

The kids seem to be healthy and strong. I think they are stunning little goats again this year!

The buckling is in the striped sweater in the back.

The doeling is in the blue sweater in the front.
They are a little skittish, which isn't unusual for kids from this doe. Once we hold them, they calm down and are fine, but some days it's a little hard to get close to them.

They both have beautiful backs, stand correctly (the doeling especially stands beautifully without any stacking), and have a gentle slope on their rump.

Vet2Be won't be showing this year, he is too old for 4-H. The little doeling would do well around here so we hope she gets sold to someone who has the chance to show her off!

Thursday, April 18, 2013

Spring Worming for the Goats

In the photos below you'll notice that there is alot of hair loss on our buck. That is one way we can tell that our goats need worming.

See the thin hair on his withers?

He is also rubbing himself on every fence and post because he is so itchy.
We wormed with Ivomec Plus because it does a very good job in our area. It's extra-label use for goats so check with your vet, just like we checked with ours, to make sure it is okay for your herd.

We follow up with a week of Mineral Max because we know that in our area most goats don't get enough copper.


We buy Mineral Max from The Farm Store because it seems to be the cheapest place for us to get it.

We also worm the does right after they kid because the stress of kidding seems to increase the worm load. The does also get a week of Mineral Max after they kid to help them stay healthy and strong while they are feeding kids and we are milking them. We keep them on the Mineral Max once a week throughout their milking and we seem to have fewer health problems.

Tuesday, April 16, 2013

Goats Who Unlock Fences

We have no idea how the buck and wether are opening the gate and getting into the back yard. But they are!

Crazy goats!

This is our temporary fix until we can figure out something better. 'Better' means we don't have to take off a bungee cord each time we head to the barn. Not the easiest task when we have our hands full of things.

See the clip at the top? That's what they manage to open. We haven't caught them doing it, but we catch them in the backyard (and in the neighbor's yard) often enough that we know they can.
The bungee is holding them in for now. We would rather have them out eating the grass then penned up eating hay, so we're stuck with this for a little while.

Hubby tried to add the chain link gate latch, but it doesn't fit on our fence. We need something the goats can't open, and something that we can open from either side of the gate. Something we can do one-handed when necessary.

I'm thinking about taking the photo to IFA and asking one of the nice folks there to come up with a solution. They always do their best to help down there, which is why I keep going back.

If you have any ideas, feel free to post them below! There has to be something easy that I don't know about, or haven't thought of.

Thursday, April 11, 2013

Freezing Aspargus

I've processed more asparagus in jars this week than I want to admit. I had 6 bunches left to process and I wanted to try freezing some.

We haven't eaten any of the processed asparagus in jars, so I'm not sure how it turned out. But I am confident that it's safe to eat and I've been saving asparagus casserole recipes just in case it is mushier than we want to eat straight out of the jar.

I hot packed about half of the asparagus in 1 1/2 pint jars because they are tall. I raw packed the other half in pint jars. I prefer processing it raw pack in pint jars because it's faster and I waste less space in the jar because I can cut the spears right in half and they fit.

Onto the freezing experiment!

Here's my set up:

I used my steam canner because the pot is big enough that I can fit the whole bunch in one pot without having to cut any spears in half. I lined my canner basket with a round cake cooling pan so the asparagus wouldn't fall through the bottom of the basket. I use the same set up when I process 1/2 pint jars of jam, too. Small jars seem to sit on the rack without tipping when loaded on the cake cooling pan.
 Blanching foods kills the enzymes (gasp! I know there are lot of people who will never allow this in their home, but since we are not able to eat fresh, raw foods every day, we like to be able to have food available to eat all the time.... even if we have no income!)

Killing enzymes stops the food from breaking down and spoiling. It also kills any harmful bacteria that might be along for the ride.

Place the asparagus on the rack, lower into the boiling water, and blanch for about 2 minutes. I make sure the water is boiling for at least 1 of the 2 minutes.

Immediately remove from the boiling water (the canning rack with handles helps do this very quickly) and place in an ice water bath. Leave the asparagus until it is completely cold... not cooled of... completely cold. This usually means leaving it in the ice for at least as long as leaving it in the boiling water.
Take the asparagus out of the ice water bath and place in a (mostly) single layer on a cookie cooling rack and place in a freezer. The more asparagus (or other vegetable) you are trying to freeze at once, the longer it will take to freeze. The quicker you can freeze the asparagus, the better texture you will have when you eat it in the future.

When the asparagus is completely frozen, seal it in freezer bags with as much air removed as possible, or use a FoodSaver. Label it, place in a deep freeze (if you have one) or the regular freezer and use within one year.


 That's it!


It isn't possible to flash freeze foods at home (I can't afford a freezer that will freeze my food in 12 seconds!) so the texture isn't the same as what I buy in the store. However, it's nice to be able to process food at home and to know there won't be a recall on it.

Tuesday, April 9, 2013

Keeping the Apple Peeler/Corer in Place

My kids love dried apples. Vet2Be, who has braces, can eat them easier than he can eat regular apples. I dehydrate a lot of apples. One of our daughters loves them so much she ate 10 dehydrated apples in 24... more than once!

Here's my set up for using my peeler/corer/slicer.
I place 4 layers of non-slip shelf liner under my clamp-style apple peeler so that it stays steady on the counter. The suction cup style wasn't available when I bought my peeler many years ago. The bucket in the background holds all the peels and cores to take out to the goats.
I use a honey dip to pre-treat my apples because my kids like it. Honey dip adds calories, makes the apples a little sweeter, and helps the apples retain a fresher color when dried.

Honey Dip
Boil 1 1/2 cups of water and 1/2 cup sugar until the sugar is dissolved. Add 1/2 cup honey when the sugar is dissolved.

Dip the apples in the mixture and let them sit for 3-5 minutes. Remove the apples, drain, and place on dryer racks. I usually place my racks in the sink and place the apples on the racks so the apples can drain right into the sink.

I always leave the bottom tray empty but lined with the plastic fruit leather tray liner so that I don't have any liquid that might drip get into the motor of the dehydrator. I'm sure lining the bottom tray with plastic wrap would work, too.

I dehydrate my apples in my American Harvester dehydrator at 145F. They take anywhere from 6-10 hours depending on the size and type of apples.

You can tell when the apples are done if they are still pliable but the sides don't stick together when you fold an apple slice in half.

I don't condition my apples because they are usually eaten within a few days. If you dehydrate a lot of apples for long term storage it is a good idea to condition them.

Conditioning is when you place the cooled fruit loosely in a sealed container and let it stand for 7 to 10 days, shaking it gently once a day. This allows the moisture to move from thicker, moister pieces to thinner drier pieces. If you see condensation on the inside of the container, return the fruit to the dryer for another few hours (unless the fruit is shows signs of spoilage or mold, in which case, throw it out!)

Here is a great reference for dehydrating foods "Dry it, You'll Like It"

Saturday, April 6, 2013

Canning Asparagus and Strawberry Lemonade Concentrate

I started canning today. I have a lot of stuff to can and I'm not sure if I can get it all done before it gets old.
There is more asparagus (scroll down the linked page until you get to "Guide 4" and download the PDF) cooling off in the canner. These were hot packed. I might try raw packing because it will be faster. I still have about 16 bunches to go. And that's after I gave away 4 bunches!
Strawberry Lemonade concentrate. Vet2Be loves it! I had a bunch of lemons in the fridge so one batch is made with real lemons, the other batch is made from RealLemon lemon juice. I'm sure the fresh lemons will taste a bit better. But it was lots faster to make the batch with the RealLemon!
This is what the kitchen looks like right now... a big mess! (Don't pay attention to the fact that I still haven't painted the walls and the electrician hasn't come back to finish the lighting in the ceiling.)
One of the handy tricks I found out at my class was using a roaster to keep jars and water hot, but not take up any room on the stove. They are great for scalding tomatoes and fruit to get the peels off, too. I found the small roaster at Savers for $20, it was brand new. It still had Styrofoam on the inside and plastic on all the parts!

The new Presto pressure canner I got through Amazon comes up to pressure much faster than the old pressure canner I have.

Some people are worried about aluminum pressure canners, but if you treat them right (follow the manufacturers instructions) they are fine. I don't cook in it so I'm not worried about my food getting aluminum in it.

I still have 1 1/2 flats of strawberries, some to be made into no sugar jam, some into low sugar jam, and more into strawberry lemonade concentrate. I've also got 6 not-quite-ripe pineapples that will be dried. And behind the pineapples are 12 apples that will be dehydrated, too. Some will have cinnamon sugar on them and some will be plain.

Oh, man! There's still a lot of canning to be done this weekend!

Here's the page from the USDA Food Preservation Guide. I like their book because it has altitude adjustments on every recipe. There isn't a comprehensive index, just an index at the beginning of each section.


Friday, April 5, 2013

Photos of the 'Kids'

A few photos I took of the kids today.
Buckling... We think his name will be Joseph.

Joseph (in the  and Mary (in the blue sweater)

Mary inside the dog house we have in the stall. A smaller spot for them to sleep in means they stay just a bit warmer.

The buckling got his horns removed this evening. Arby's (the steer) thinks the kid smells funny and wants to clean him up.
Joseph had a shot of Biomycin 200 today. His breathing is a bit loud. We would have waited to disbud him, but the kid has horns already! We were a bit surprised it was the buckling that is having trouble breathing, we would have thought it was the doeling after all the trouble she went through when she was born. It's a good thing we check on them every day.

We can stay ahead of big trouble most of the time when we are out there often.


Thursday, April 4, 2013

Annie Kidded!

Annie kidded on Easter Sunday. We came home from church and Vet2Be went to check on the goats. He came in and said Annie was getting ready to kid.

We hurried out to finish cleaning a stall for her because Vet2Be hadn't quite finished on Saturday.

Annie had a buckling and a doeling. Both needed a little bit of help. The buckling was big and his legs were tucked back, so I had to pull his legs forward before he could be born.

His little sister was born 'butt' first, which isn't a good thing. No feet came out first, just a tail.

It took us about 5 minutes of using a nasal aspirator to get her mouth and nose cleaned out enough for her to breath.

They are both healthy and doing well!

Here's the buckling.

Here's the sweet little doeling. She is really friendly, probably because we had to spend so much time cleaning out her airways.

Wednesday, April 3, 2013

Master Food Preserver Program

I just finished taking the Master Food Preserver Program through the USU Extension Service. Not only did I have a great time and meet some wonderful people, I learned alot!

Today we finished up with Strawberry Lemonade Concentrate, which Vet2Be has almost finished. Along with some Pickled Corn Relish. Along with a few other great recipes which I'm excited to try.

If I pass the test, my next responsibility will be to volunteer for 40 hours in our community teaching how to properly preserve food.

Hopefully I'll be posting some of the food projects here, how they turned out, and how much time it takes from fresh food to finished product.

I think I've over booked myself for this weekend. On the list of foods to preserve: 2 flats of strawberries, 21 pounds of pineapple, and 28 lbs of asparagus.

My married daughters and I started participating in Bountiful Baskets, and they had strawberries, pineapple, and asparagus available.

The plan:
Some of the strawberries will be dehydrated, some will be made into jam
Some of the pineapple will be dehydrated (Son1 said he would help) and some will be canned.
Some of the asparagus will be canned, and some will be frozen.

I ordered a Pineapple Corer Slicer Peeler Cutter because a few of the women in our class have it and love it! Hopefully it will be here by Friday.

I also ordered and already received a Progressive International Canning Scoop. I love it! I canned some ground beef last week and the shape of the scoop made it so easy to get into the corners of the pot. It holds 1/2 pint, which is so much nicer than a regular ladle, it has a hook so it sits on the edge of the pot, and the shape of the handle is comfortable to use.


I also have been using my new embroidery machine like a crazy woman, but I'll post some of those projects later.

I've also had alot of chances to babysit my grandson, which has been so much fun!

I haven't planted the garden yet, so many things are keeping me busy that I haven't blogged for months! Hopefully the garden will get some seeds next week.