Saturday, October 30, 2010

Book Review: American Farmstead Cheese

Wow! I have only finished the first few chapters of this book and I have learned so much about cheesemaking! If you are interested in the why and how of cheesemaking, not just recipes, this is a wonderful book.


Since Hubby has a Ph.D. in Synthetic Organic Chemistry, there are often chemistry words floating in the air at our house. Sometimes there are chemistry experiments sitting on the kitchen counter. Sometimes the kids have accidentally eaten some of Hubby's chemistry experiments that were sitting on the counter (nothing that would harm them, don't worry!) Two of our children are studying biochemistry at the University.

Although I am not a chemist, I am familiar with the jargon because of the house I live in, so the first few chapters weren't difficult to understand. I suppose if you have a really hard time with chemistry, then you might have some trouble. But I doubt it, the author does a great job explaining the chemistry of milk and how it affects cheesemaking.

Wonder why your cheese turns out differently in the fall than the batches you made in the spring? It's the fat to casein ratio and the mineral content.

Last week I was wondering why I needed more salt in my Feta this time of year. There is more fat in the milk in the fall!

Lots and lots of information. I haven't taken any cheesemaking courses, although one is offered at a University close by.  I think I saved myself a pile of money by purchasing this book instead of taking a class.

I am thoroughly enjoying this book and can tell this is one that will be on my reference shelf!

Friday, October 29, 2010

Fresnel Lens Cooker

Sheepy's Dad is making some Fresnel lens cookers! Sheepy and her family have been collecting old projection TVs with plastic lenses on the front. Sheepy's dad builds the frames.

Taco showed us one last week. It started a piece of bark on fire in less than 3 seconds.


They look like they are so much fun! Hopefully, we'll get to see one in action soon.

If I ever get one, I'll have to make a cover for it. Taco made sure to cover theirs when it was sitting in the car. It wouldn't be a good thing for the car to start on fire, or anything 

I wonder if there is a safe way to use one of these to heat the animal's water in the winter, or at least thaw it out once a day.

Dehydrated Tomatoes: Update

I've lost count of how many bushels of tomatoes I've dehydrated! There have been alot!

I wanted to write down some of the things I've learned work best so that when I start this project again next year, I'll have a good reference.

  1. The tomatoes in cardboard boxes lasted longer than tomatoes gathered and stored in plastic buckets, even longer than the ones in the plastic buckets with drainage holes in the bottom.
  2. Lay an old towel down on the counter. It will save clean up time, and save you from slipping on the juice that might drip onto the floor.
  3. Spray the trays with some sort of non-stick coating. I only had to do that once, and the tomatoes didn't stick again.
  4. Wear gloves! I didn't wear gloves on the first batch and my hands were sore the next day from the acid in the tomatoes.
  5. Slice at least 1/4" thick. I can dry more tomatoes that way, and they don't stick to the tray, especially when using the non-stick spray.
  6. If the tomatoes are a little soft, make sure you sprinkle them with non-iodized salt. Mine don't seem to turn black that way, and they have a nicer color if they have been sprinkled with salt. 
  7. However, sprinkling salt on the tomatoes will make the tomatoes drain juice a little faster, so make sure the tomatoes are done dripping before you put them on the dehydrator.
  8. We some of the tomatoes dried with basil, onion granules, and salt. The ones that had marjoram as well, didn't impress me as any better tasting than the ones without. It's nice to have them pre-seasoned, so I'll always put salt and/or other seasonings on before drying.
  9. 1 ounce of dried tomatoes = 1/4 cup of tomato powder. Sometimes I want to use crushed or whole tomatoes from a can, if I can weigh out the tomatoes, then I can use my conversion table easily. I found the conversion tables here at Diane Hopkins blog under the title: Power-Packed Nutrition: V8 Powder.
  10. Run a fan near the dehydrators. It tends to move the moist air away from the dehydrator and the tomatoes dry faster. The dehydrator also puts out a fair amount of heat, so if the weather is nice outside, you can put the fan in the window and set it to the exhaust setting. If the weather is cold, then the fan seems to move the air throughout the house better than just letting the dehydrator sit in the room and work.
  11. The dehydrator is noisy! Put it in a room where it won't bother anyone.

Thursday, October 28, 2010

Oregon Trail Quilt: Extra Blocks

I generally like bigger quilts. If a quilt doesn't turn out queen-sized, then I add blocks or change the setting so I end up with a big quilt. It seems to me after all that work I should have something I can use, not hang on the wall!

The following blocks are the blocks I added to my quilt. The next step is to sew everything together and take it to the quilter to quilt. As much as I like a hand quilted quilt, they have to be treated so carefully that I don't finish my quilts like that. If they are machine quilted I can wash them in my front loading washing machine, and we can use them on the beds!

I went through the patterns from a few years ago when we also made 6" blocks and chose some that I thought would fit in an Oregon Trail quilt. I also found a few blocks on the internet to add.

All these blocks look like lots of work, just remember that it took me a year to sew all the blocks in my Oregon Trail quilt. I still haven't put all the blocks together. It just took me a long time to get all the photos and then post everything. Most months I only made the four blocks required for the class. There were a few months when I made a second set of four blocks so that my quilt would be bigger.

Tumbling Leaves. This is a directional block, it looks a little different depending on how you set them into the quilt.
You should be able to click on the image above and then right-click and save as to your computer.


Monkey Wrench.

You should be able to click on the image above and then right-click and save as to your computer.
Sawtooth Star
You should be able to click on the image above and then right-click and save as to your computer.
Joshua's Ladder, another directional block. I haven't decided how I am going to put this one together yet, but it will probably be this way.

You should be able to click on the image above and then right-click and save as to your computer.
Flying Geese

You should be able to click on the image above and then right-click and save as to your computer.

North Wind, another directional block, sort of. I can't really imagine it being put together any other way.
You should be able to click on the image above and then right-click and save as to your computer.
North Wind is another block that I paper pieced. Here is the pattern I drafted. The directions above show a much easier way to make the block, but I really wanted to have the corner triangles solid, and the only way to do that accurately is to paper piece the pattern.
You should be able to click on the image above and then right-click and save as to your computer.
I rough cut the pieces for North Wind before I paper pieced it. It makes for a much more accurate and faster block than the cut-as-you-go method that I've used before.

That's all the blocks, except for the filler blocks that will go between the pattern blocks. As soon as I get my other projects to a point where I can sit and sew, I'll sew up the top and post a photo of that, too.

Wednesday, October 27, 2010

Snow Before Halloween

A few photos of what we woke up to this morning. It's a good thing that we got some of the leaves raked on Monday! We don't often have snow before Halloween. I don't know if this means we are going to have a hard winter, or not.

The patio.

Beyond the fence you can see the play yard. It has a tarp on the top level and two more tarps on the sides, one on the north and one on the west. It is doing a great job of keeping the wood that is stacked underneath dry.

The maple tree in the back yard still hasn't lost it's leaves, poor thing! I'm glad it is a sturdy tree and we don't have to worry about the weight of the snow on the branches.
We have already had the wood stove going a few times this winter. Our daughter who lives in New England said they run their pellet stove all day and night now because it is so cold there already!

One more thing I wanted to write down so I don't forget... Sparky's tail FINALLY fell off yesterday! We've been checking it every day for a few weeks wondering when it was going to come off. Here is the link to the original post. It took a month for it to fall off. I don't remember the smaller lambs taking this long, but maybe they did. We'll be sure to do it when they are younger next spring.

Time to milk!

Oregon Trail Quilt: Log Cabin

At the end of the journey, it would be time to build a log cabin, so that's the last block the quilt store gave us to do. I like paper piecing, and I like the center square of the log cabin to be the same size as the other strips, so I drafted a paper piecing pattern instead of using their directions.

Photo of finished blocks. This is the way I will put it into the final quilt. Since this is a directional block, it will look differently depending on how it is placed.

You should be able to click on the image above and then right-click and save as to your computer.

You should be able to click on the image above and then right-click and save as to your computer.
I rough cut the pieces for my log cabin and then paper pieced them. I don't cut as I go, I cut all the pieces at once, just like I do for a regular pieced block. It saves me time and frustration cutting them to a little larger than the piece in the block. Paper piecing gives very accurate blocks! I love it!

Tuesday, October 26, 2010

Oregon Trail Quilt: Prairie Queen

Prairie Queen took some time to stitch together. I strip pieced the small 4-patches used on the center sides of the block. That made it go faster than stitching together so many 1 1/2" squares! I also used a special ruler called a Triangle Square Up Ruler by Quilt in a Day. It made the corner half-square triangles very quick to piece.

This is a fairly old block. A Prairie Queen is a woman who lived, worked, and raised a family on the prairie.

Photo of finished Prairie Queen block.

You should be able to click on the image above and then right-click and save as to your computer.

You can find directions for Prairie Queen at Patterns From History.

Here is some fun information on Prairie Queens found at Prairie Queens.com.

You, or your female ancestor, might be a Prairie Queen if:

  • You had any of your children at home, alone, with no doctor or midwife, no medicine and no family member present.
  • You learned how to knit, sew, crochet, embroider, quilt, tat AND needlepoint all before the age of 12.
  • You have cooked beaver, raccoon, possum, ground hog, squirrels or whatever else was brought home.
  • You made mincemeat for pie by starting with a whole hogs head
  • You have recipes for souse, hogshead cheese, egg butter and green tomato pie.
  • You make your own sauerkraut from scratch.
  • You make a poultice to put on your child's snakebite.
  • You have six or more children.
  • Your cellar is filled with canned vegetables from your garden.


Monday, October 25, 2010

Oregon Trail Quilt: Broken Wheel

Another block that I enjoyed making and I really like the way it looks, too! The ladies at the store who chose the colors did a fantastic job!

Of course you would find a Broken Wheel block in a quilt titled "Oregon Trail!"

Photo of the finished blocks.
You should be able to click on the image above and then right-click and save as to your computer.


If you want to try a 12" block, you can find it here at Quilter's Cache.

Saturday, October 23, 2010

Oregon Trail Quilt: Rocky Mountain Puzzle

I loved this block! I don't know if it is the colors or the pattern, but I like it either way!

The directions for the block are for two fabrics, I really wanted a third color since most of my blocks have three fabrics in them, so I used a different color for the center block and for the corner blocks. The half square triangles are made out of the two fabrics that the store provided.

Photo of the finished 6" blocks.

You should be able to click on the image above and then right-click and save as to your computer.

The directions at Quilter's Cache are for an 8" block.

Friday, October 22, 2010

Oregon Trail Quilt: Indian Mats

Not my favorite block, but the name works in with Oregon Trail, that's why they chose it. It looks quite a bit like Bear Paw, but the coloring is different and the 'paw' is solid on a Bear Paw. Here's the link to my Bear Paw blog entry.

Photo of the finished blocks.
You should be able to click on the image above and then right-click and save as to your computer.

If it had been me picking the patterns for the quilt instead of the quilt store, I would have chosen this version of Indian Mats found at Quilter's Cache. The rules of the "Free Block of the Month Class" are that you have to complete the quilt squares from the last month in order to get the kit for the next month for free.

I almost always get my blocks done, I think there has only been one time in 5 years that I haven't. If I don't particularly like the block pattern, then I don't add it to the quilt. But I always do the block because I almost always learn something while I am working on it.

Thursday, October 21, 2010

Tomatoes and More Tomatoes

Sheepy's Dad has lots and lots of tomatoes. The agreement is that I will dry as many as humanly possible and she gets half. What a great deal for me!!

Here are the 4 boxes that got it started.

I found out that if I spray the trays with non-stick cooking spray the tomatoes release easily and I don't have to wash the trays as often between batches.

The first 9 trays. Hubby had another 20 trays at work, which he brought home a few days later when another 4 bushels of tomatoes were dropped off. It takes me about 40 minutes to wash, slice, and fill 15 trays!

I love this dehydrator! It will handle up to 30 trays, although I don't put more than 15 on at a time. Hubby has two bases at work, so I have two dehydrators going almost all the time. It takes between 18-24 hours to dry one batch of tomatoes. 
Dehydrating tomatoes is so much easier on me than bottling them. I get to work for a few hours and then the dehydrator does the rest. I don't have to babysit the canner or worry about jars breaking. All I do is slice and stack!

So, what am I planning on doing with all these tomatoes? I made my first batch of lasagna last week. I blended the tomatoes in my blender until they were a powder, added water, garlic, onion powder, and salt to make the sauce. I was very tomato-y flavored. If I had let the sauce simmer on the stove, I'm sure it would have mellowed the flavor a bit.

Here's a link to Diane Hopkins blog post about V8 Powder: although I have only dried tomatoes, the idea is the same. At the end of her post are two great tables that show how much tomato powder to mix with water to make tomato paste, tomato sauce, tomato juice, or stewed tomatoes.

I've lost count of how many bags of tomatoes I've sealed. These are the two that are ready to head to the storage room.
I am sealing my tomatoes as they come out of the dehydrator, not powdering them first. That way if I want stewed tomatoes I can crumble the tomatoes a little and just add hot water.

Wednesday, October 20, 2010

Oregon Trail Quilt: Traveler's Star

Here is Traveler's Star. It's been done for quite a while, I just haven't had the time to take a photo and post it along with the directions.

Traveller's Star. Very similar to Friendship Star, the only difference is the corner blocs are half-square triangles instead of solid blocks.

You should be able to click on the image above and then right-click and save as to your computer.

Tuesday, October 19, 2010

Busy!

It's been a while since I posted. We've been busy!

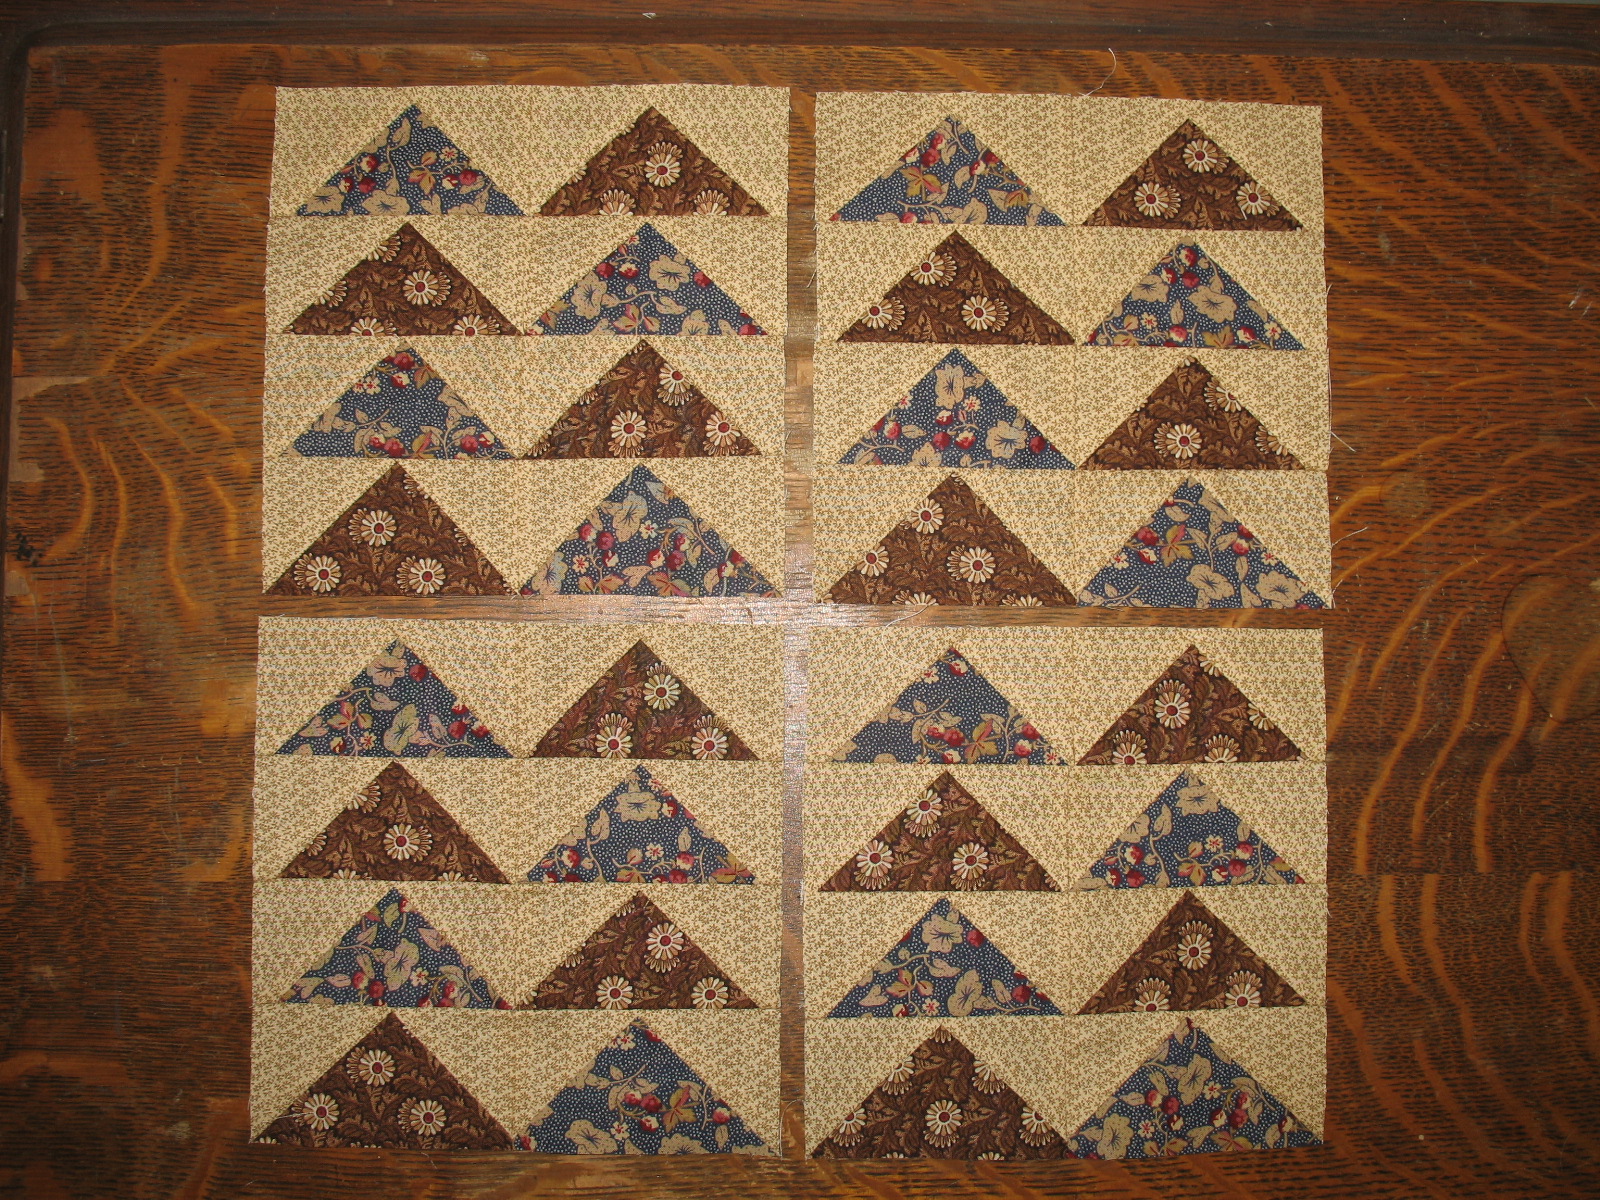
My goal for the coming week is to finish taking photos of the last blocks I did for my Oregon Trail Quilt. The blocks are all done, so are the setting squares. That was my goal for last week--getting everything finished. Hopefully by the end of next week I will have the entire quilt top sewn together and, if I have more time than I thought, to have the border on the quilt, too!

Son1 and Prion were home last weekend. Prion was sick so we convinced her that her own bed would be a much better place to sleep and rest than her apartment. She also has 4 mid-terms coming up this week and has a tutor on hand here (Hubby), but not as easily accessible at school.

She is one smart cookie! But sometimes, as with all really intelligent people, she is forgetful of the mundane things. She brought her blankets and sheets home to wash this weekend. When she and Son1 left on Sunday afternoon, she forgot them. Monday morning saw me taking off for the 2 hour drive to deliver them to her. She slept in a sleeping bag on Sunday night. Both she and Son1 have sleeping bags in the trunk of the car just in case they go camping or have an emergency.

Son1 was helpful, as usual. He and Vet2Be cleaned out the buck pen and did a few chores around. Son1 also brought in a bunch of pine needles from a neighbor's yard and piled them in the poultry pen for winter.

I got part of one flower bed cleaned out.

Last week Vet2Be and his best friend, Taco, cleaned up the old wood pile, fixed up the stacked wood and tarped it for the winter, and put up some fencing. It's wonderful to have the mess in the yard gone, it filled up one entire garbage pail! And it is nice to have the wood pile ready for the coming snow.

Vet2Be is much better this year! Last year he was so sick because of the toxic fumes in the basement that he didn't get much school work done. He got more than half-way done with his Algebra, but this year he started again. I think all the toxic stuff from the basement is finally out of his system. Only now we are realizing just how sick he was. He started on Algebra 1 again, and remembers nothing from last year. He pushed and pushed to do work last year, but none of it stayed in his brain. I doubt he remembers any history or science, either.

With Vet2Be so motivated and awake this year, I've had time to work on quilts and knitting this fall! Yay!

And dehydrating tomatoes!

Sheepy's dad has lots and lots of tomatoes! She and her family got so tired of bottling them that she asked if she could borrow our dehydrators. Then she remembered that I had offered to dry pineapples for her (she once got a whole bunch of pineapples for free!) if I could keep half of them.

So, I get bushels and bushels of tomatoes for free and all I have to do is give Sheepy and her family half of the dry ones. I give her a little more than half because she has a bigger family and she and her dad did all the gardening.

Ahh... autumn! It's busy, just like the rest of the year, but I am glad for a change in work! I don't know if I would like a 'regular job' because it seems as if it would be the same thing month after month. Being a wife and mother means I get to change things a little from season to season, it's almost like having a vacation!

Monday, October 11, 2010

Pinwheel Disappearing 4-Patch quilt block

This is a long tutorial so I published it on Scribd instead of putting the whole thing in a post. This is what I did over the weekend. It was lots of fun!

It looks much harder than it is. The original blocks are two different 4 patch blocks. The final block looks like you spent hours and hours putting together tiny triangles.

Photo of 4 finished blocks.
Writing the tutorial took longer than piecing the block!

Pinwheel Disappearing 4-Patch Tutorial

Friday, October 8, 2010

Peaches!

Sheepy placed a group peach and fruit order for a whole bunch of people! It was alot of work for her. She took orders, collected money, and picked up the fruit. We picked it up at a drop off point in the next town.

Oh, how I love good friends like that!

I knew I wouldn't have much time to take care of alot of peaches, but I wanted to put some up, so I ordered one box. Not very much, but a little is better than nothing. I ordered a box of 'ripes', which means they are ready to do that day. My plan was to make fruit leather out of them. But they were nicer peaches than I expected, so I decided to freeze them instead.

I thought about bottling them, but Vet2Be has lost his taste for sweets and sugar over the last year. I knew that bottled peaches would be much too sweet and they would just spend time decorating the storage room

I have some family members who don't bottle or preserve food, so this post is for them just in case they want to try this themselves.

One box of peaches. This is about 1/2 bushel box.

My set up: a towel on the counter to catch spills, a flexible cutting mat and sharp knife, assorted cookie sheets and cooling racks to freeze the fruit on, a bowl for the skins (the skins go to the chickens and ducks.)

A bowl of water and ice on the right.

Scald the peaches for 4-5 minutes so the skin is easy to remove.

Place the peaches in the ice water to cool quickly. I don't want cooked peaches, I just want to be able to slide the skin off the flesh.

Slice the peaches and place on a cooling rack or cookie sheet sprayed with non-stick coating. Place the trays in the freezer. It only takes the peaches about an hour to freeze. I could put the peaches directly into a bag and freeze them, but then I wouldn't be able to use only part of a bag. This way the peaches are frozen individually and we can take out enough for whatever we need them for.

Place one tray full of frozen peaches in a bag. Each bag holds enough to use in a cobbler.  Or we can make  fruit smoothies and re-seal the bag. I got about 10 bags of peaches from one box.
I also have three or four bags of frozen strawberries in the freezer. I've been freezing them throughout the summer when there is a good sale on them.

I love frozen fruit! I know that our family does, too. We always eat all the frozen fruit, but we don't always eat the bottled fruit. I know the bottled fruit doesn't take any freezer space, but I like to be able to eat what we store and store what we eat.

Tuesday, October 5, 2010

Rhubarb Incident

Son1 made a wonderful Rhubarb/Mixed Berry pie on Saturday. It was delicious from what I've been told. It wasn't gluten free... so none for me!

Vet2Be thought it was soooooo good that he had about 1/3 of the pie. Big mistake!

He hadn't had very much to drink on Sunday, and with all the rhubarb in that pie, it made him a little sick. While we were out milking he felt a little weak and had to sit down. He felt a little light headed. And he felt some odd sensations in his throat. We weren't sure what was going on, maybe he was getting sick again.

But then we remembered just how much pie he had eaten!

I knew that the leaves of the rhubarb plant aren't edible. I trimmed those off when I froze the rhubarb. But after reading more about rhubarb we found that the leaves should be trimmed off immediately.

Tuck that piece of information away for future reference! It would have been very easy to trim the leaves while we were harvesting the rhubarb!

Here's a link that Hubby found for rhubarb: The Rhubarb Compendium If you like chemistry and science, this is a great page because it goes into some of the chemical processes that occur when you eat oxalic acid.

Without going into the chemistry behind what happens with the body and oxalic acid, I can tell you that Hubby decided that Vet2Be had better drink a whole lot of lemonade (we make it with Real Lemon juice) because the citric acid in the lemon juice would somehow combine with the calcium in the body instead of the oxalic acid combining with the calcium. I don't get it! I'm not a chemist.

I asked if it would be better if we added some citric acid to the lemonade. We always have citric acid around here. I use it in cheesemaking, Hubby uses it in some of his processes.

I added 1 teaspoon of citric acid to a gallon of lemonade.... wow! That tastes great!  Hubby had Vet2Be drink about 32 ounces of Lemon-ade and he felt better within 30 minutes.

I don't know if this would be considered a cure for too much rhubarb or too much oxalic acid, but it helped Vet2Be. And we love the new taste of the lemonade with citric acid added!

It also reminded me how much I love being married to a chemist. I'm not sure even the doctors would have been able to come up with something as simple as lemonade!

Monday, October 4, 2010

Pocket Tissue Cover

I have a few friends who have had loved ones pass away the last few weeks. I found an idea to make a cover for the pocket tissues, of course I had to change the idea and make it my own.

You need a few scraps of fabric and about 20 minutes or less to sew one up.

Link to the Scribd PDF file: Pocket Tissue Holder

Here are the instructions:

Cut lining fabric 6 1/2” x 8”
Cut outside fabric 6 1/2” x 6”

Match 6 1/2” edges of lining and sew with a 1/4” seam.

Turn right side out and press the seam towards the lining fabric.

Fold so that the lining is on the inside and the main fabric is on the outside. 
Tape close to the edges.

Fold so that the lining is on the inside and the main fabric is on the outside. 
Tape close to the edges.

Tuck the back in just a little so that it is easier to zig-zag stitch about 1/2” from the edge towards the center. 
The tape holds the pieces together. Remove tape after sewing the zig zag stitch.
You may skip this step and the taping. I like the idea of the slit being reinforced.

Turn inside out and sew a 1/4” seam along each raw edge.

Trim corners so the corners will lay flat when you turn it right side out.

Turn right side out. 
Push corners out so they are square.
Press and steam lightly.

Slip the tissues into the pocket.
I take the plastic package off the tissues, but that isn"t necessary. You can slip a new package inside instead.